• What Older Homes in Buford Taught Me About Prioritizing Maintenance

    Older home in Buford GA with mature trees and visible signs of routine maintenance in a quiet neighborhood

    The first time I owned an older home in Buford, I almost made a $20,000 mistake within the first year.

    Nothing looked wrong at a glance. The kitchen had been updated, the paint was fresh, and everything felt move-in ready. But a few months in, after a stretch of heavy summer rain, I found moisture building up in the crawl space. Not long after that, the HVAC system started struggling to keep up with the heat.

    That was the moment it clicked. Older homes don’t fail all at once. They fail where maintenance was delayed.

    If you’re buying or already living in an older home in Buford, Georgia, understanding what to prioritize can save you a lot of money—and stress.

    Key Takeaways
    • Focus on structural and mechanical systems before cosmetic upgrades
    • Many older Buford homes hide deferred maintenance behind updates
    • Prioritizing correctly can save thousands over time
    • Georgia’s humidity accelerates wear on roofs, crawl spaces, and HVAC systems
    • Having trusted service contacts early prevents bigger issues later
    • Appliances often fail sooner than expected and should be planned for

    Why Older Homes in Buford Are Still Worth It

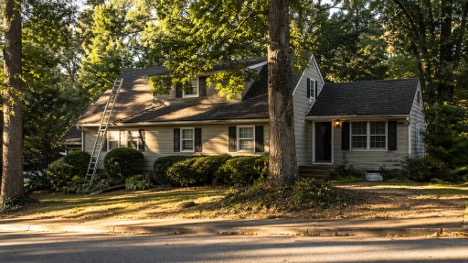
    Buford sits in Gwinnett County, close enough to Atlanta for convenience but far enough to keep a slower pace. The older neighborhoods—especially those closer to downtown or tucked near Lake Lanier—offer something newer developments usually cannot.

    You’ll notice it right away. Larger lots. Mature trees. Homes that feel established rather than newly dropped into place.
    Many of these houses were built in the 1970s and 1980s, before aggressive cost-cutting became standard in residential construction. The framing tends to be solid. The layouts are practical. And the neighborhoods have had decades to settle in.

    But there’s a trade-off.

    When you buy an older home, you’re not just buying the structure. You’re inheriting every maintenance decision the previous owners made—or avoided.

    The Most Common Mistake I See

    People fix what looks outdated instead of what actually matters.

    It’s understandable. A new kitchen or updated fixtures make a home feel complete. But those upgrades don’t mean much if the roof is near the end of its life or moisture is quietly building under the house.

    Buford’s climate doesn’t give you much margin for error. Long, humid summers keep crawl spaces damp. HVAC systems run hard for most of the year. Roofing materials break down faster than many people expect.

    Ignore those systems, and cosmetic work becomes temporary.

    What to Fix First in an Older Buford Home

    Start With Function, Not Appearance

    When I walk into an older home now, I don’t pay much attention to finishes. I’m looking at how the house performs.

    Roof

    If there’s one place to start, it’s here.

    In Buford, roofs typically last around 15 to 20 years, sometimes less, with constant sun exposure and humidity. Granule loss, soft spots, or poorly installed flashing are all early warning signs.

    Replacing a roof isn’t cheap. Depending on the home, it can run anywhere from $8,000 to $18,000 or more. It’s not something you want to discover after closing.

    HVAC System

    Georgia heat puts HVAC systems under constant strain.

    Most units last about 10 to 15 years in this environment. Once they pass the 12-year mark, I start assuming replacement is coming unless there’s clear documentation of consistent maintenance.

    Service history matters more than appearance here. A clean-looking unit doesn’t tell you how hard it’s been working.

    Crawl Space

    This is where many expensive problems begin.

    Moisture is persistent in Buford, especially in homes built before modern vapor barriers and sealing practices became common. Left unchecked, it leads to mold, wood rot, and eventually structural damage.

    Encapsulation can feel like a high upfront cost, but in many cases, it’s one of the best long-term investments you can make in an older home.

    Electrical and Plumbing

    Homes built before 1990 often come with systems that weren’t designed for today’s demands.

    That might include aluminum wiring, outdated panels, or galvanized pipes that are already restricting water flow.

    These aren’t cosmetic concerns. They affect safety, reliability, and insurance in some cases. I always evaluate these early, even if there are no obvious issues yet.

    Laundry room in an older home with a dryer and visible lint buildup near the vent, showing a common maintenance issue

    The Lesson I Learned About Appliances

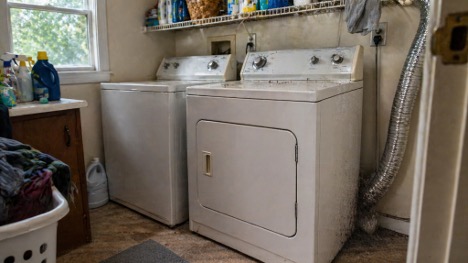
    Appliances are easy to overlook because they’re still working—until they’re not.

    In my case, the dryer started taking longer to finish a cycle. It didn’t seem urgent, but I had it checked anyway. If you’re dealing with something similar, getting help from a local service that handles appliance repair in Buford early can prevent bigger problems.

    Since then, I’ve treated appliances differently.

    When I move into a home, I document the age of everything—washer, dryer, refrigerator, water heater. From there, I plan ahead rather than wait for failure.
    A simple rule I follow: if a repair starts approaching half the cost of replacement and the unit is already older, I start leaning toward replacing it.

    When Cosmetic Updates Actually Make Sense

    Once the major systems are stable, cosmetic improvements become much more worthwhile.

    This is usually the point where the house stops feeling like a project and starts feeling like your home. You’re no longer reacting to problems. You’re making intentional choices.
    In older homes around Buford, the best results often come from working with what’s already there rather than replacing everything outright. Original hardwood floors, solid wood trim, and even older windows tend to have a level of quality that’s expensive to replicate today.

    I’ve seen homeowners get greater long-term value by restoring rather than starting over.

    That said, when you do move into upgrades, especially in kitchens and bathrooms, the decisions go beyond just design. Where you source materials can affect cost, durability, and overall outcome. If you’re weighing your options, this guide on choosing bathroom products: showroom inspiration or online convenience breaks down what to consider before buying.

    Simple updates like repainting, refinishing floors, or improving insulation often deliver more value than jumping straight into a full remodel. Get the timing right, and those upgrades actually last.

    Why Location Still Matters Within Buford

    Buford has grown quickly, especially toward Braselton and Hamilton Mill. New construction is everywhere.

    But the older neighborhoods, particularly those closer to downtown Buford or near Lake Lanier, still hold a different kind of appeal.

    They feel established. The lots are more generous. The surroundings aren’t constantly changing.

    Buyers are starting to notice that again.

    Well-maintained older homes in these areas are becoming more competitive, not less. And that makes proper maintenance even more important if you want to protect long-term value.

    What Experience Has Taught Me

    I’ve seen two very different outcomes.

    One homeowner spent around $25,000 updating a kitchen while ignoring moisture issues under the house. Within a couple of years, they were dealing with repairs that could have been prevented entirely.

    Another buyer took a less updated home, focused on the roof, crawl space, and HVAC first, and slowly improved everything else over time. The house appreciated, and the maintenance stayed manageable.

    Same type of home. Completely different results.

    The difference comes down to order.

    Handle the systems first. Everything else can wait.

    Frequently Asked Questions

    Are older homes in Buford a good investment?

    Yes, especially in established neighborhoods near downtown or Lake Lanier. The condition of the home matters more than its age.

    How much should I budget for maintenance?

    A common guideline is 1 to 2 percent of the home’s value annually. For older homes, it’s safer to expect closer to 2-3% in the first few years.

    What problems are most common?

    Crawl space moisture, aging HVAC systems, roof wear, and outdated electrical or plumbing are the most frequent issues.

    Is it worth restoring original features?

    In most cases, yes. Original materials often add more long-term value than modern replacements.

    When should I repair versus replace an appliance?

    If the repair cost approaches half the price of a new unit and the appliance is already older, replacement usually makes more sense.

    Closing Thoughts

    Older homes in Buford aren’t risky—they just require a different approach.

    The biggest shift for me was learning to prioritize what keeps the house running, not just what makes it look better.

    Once the roof, HVAC, crawl space, and core systems are taken care of, everything else becomes easier—and more rewarding.

    Get that order right, and these homes offer something newer builds often can’t: character, stability, and long-term value that grows with the way you take care of it.

    partnered post • partner images

  • Some of the Repairs You Should Do When Moving Out

    14683431173_995327002f_b

    Homes play a significant role in our lives. Many people tend to be excited when they finally move out. When moving out, you should not be too carried away by the events, especially if you are planning to sell the house. Those that have tried selling their homes know that it is a struggle. Only a few lucky homeowners have sold their homes with no challenges. There are things you may require to do to increase your chance of making a sale at a good price. Below are some of the repairs you should consider when moving out.

    Holes in the Walls

    Making a sale when moving things out of the home is challenging because of various reasons. The true condition of the house may have been hidden by some of the items inside. When the house is nearly empty, buyers are most likely to see the damages on the walls. The first repair you should consider doing is to patch any holes in your walls. Make sure you patch the holes neatly to the point that a buyer may not notice. No one will be willing to spend a lot of cash on a house with holes in the wall.

    Paint

    It is essential to make the house you wish to sell be captivating. It needs to capture the attention of potential buyers. Many people are informed to paint their homes if they want to make a quick sale. Well, a little fresh paint will be significant in helping you sell your home. However, this does not mean that you have to repaint the whole house. Repainting a room or two may be all it takes. Make sure that you choose a neutral color when painting. You should consider getting more useful info from a professional on the type of color and paint to use.

    Cleaning

    Making your home look presentable is crucial when selling it. You should make sure that you take your time cleaning the house. Every room should be clean and tidy. This will make potential buyers view the home feel welcomed and at home. You can even hire a professional to help you clean up the place. Things like cleaning up the carpet or hardwood floors may require extra attention and skills.

    Fix Minor Plumbing Issues

    There are some repairs you can comfortably do yourself, and this includes repairing minor plumbing issues. Make a point of checking if there is any leakage in the kitchen sink, and if there are any, try to fix it. Another place that may need a minor plumbing fix is the bathroom. Many people tend to focus on the bathroom when buying a home. If there is a major plumbing problem, you should call a plumbing expert to be on the safe side.

    Conclusion

    Though doing the repairs mentioned above will help you sell your home, you should also consider hiring an experienced real estate agent. You should also consider remodeling some of the rooms like the kitchen and master bedroom.

    partnered post • cc-licensed image by Guy Kilroy

  • Broken Antique Window Glass?

    Learn How to Replace It With Historically Accurate Restoration Glass®

    thanks to Renee Rosiak & Bendheim for this submission

    Owners of historic homes and buildings take great pride in their antique window glass. With its occasional wave, bubble, and characteristic imperfections, it testifies to the history of an old structure or a piece of furniture, exuding the charm and character of by-gone days.

    The making of window glass began in the 7th century with the development of mouthblown Crown glass. The 11th century saw the invention of the Cylinder glass method of producing mouth-blown antique window glass, first developed in Germany. Today, Cylinder and Crown glass are two types of authentic, mouthblown antique window glass found in fine American homes and buildings built from the 17th to early 20th centuries.

    When old window glass is broken or damaged, people often go to great lengths to find a perfect match in order to preserve the historical integrity of a home or building. Finding the right glass can pose a significant challenge, considering the relatively wide-spread production of antique window glass ended after the invention of the first mechanical method for “drawing” glass, to be later followed by today’s ubiquitous “float” glass.

    Window glass salvaged from another old building can be one replacement option. However, it can often be challenging to remove it from its old frame, cut it to the required size, and clean it.

    An excellent alternative is to purchase cut-to-size “new antique” window glass made today utilizing the same techniques and tools used to make mouth-blown glass centuries ago. Authentic Restoration Glass®, produced at Germany’s Glashütte Lamberts, is crafted by skilled glass masters. The factory has preserved the mouthblown production methods through generations, guaranteeing the historic accuracy of this glass. As a testament to its authenticity, Restoration Glass is found in our country’s most prestigious restorations, including the White House, George Washington’s Mount Vernon home, and Thomas Jefferson’s Monticello.

    view through regular glass window with no restoration

    view through regular glass window with no restoration


    view through Light Restoration Glass® window
    view through Light Restoration Glass® window


    view through Full Restoration Glass® window
    view through Full Restoration Glass® window

    To match precisely the original structure’s time period or the desired glass appearance, homeowners can select one of two varieties of Restoration Glass – “Full” or “Light.”

    Full Restoration Glass is more distorting and accurately represents antique window glass made in the 17th and 18th centuries. Its distinct, somewhat “wavy” appearance makes it an excellent choice for colonial-style windows, antique and reproduction furniture.

    Light Restoration Glass is less distorting and is an excellent match for glass found in structures built in the 19th and early 20th centuries. Its slight distortion is more pronounced when viewed from a distance, in reflected light, and over a large area, making it ideal for use in windows and doors.

    If uncertain about the appropriate amount of distortion, homeowners can request samples from Bendheim or send a piece of the original glass to the company to determine the best possible match.

    “New antique” window glass offers additional advantages to homeowners by blending historically accurate aesthetics with modern capabilities and standards. Today, Restoration Glass can be laminated with a special resin interlayer to provide an impact-resistant safety glass, which will remain in place if broken, as well as provide enhanced sound control. Current building codes require safety glass to be installed in doors and sidelites, among others.

    To restore a damaged old window and replace its broken glass, homeowners can hire a glass installation professional or do it themselves. Those with the skill to complete the installation on their own will benefit from the following tools: protective gloves and goggles,  heat gun, putty knife, glass cutter, framer’s point gun, pliers, primer or shellac, glazier’s points, Calcium Carbonate (“whiting”), paint brush, and paint.

    The steps below and an instructional video (featuring the restoration of Martha Stewart’s 1805 farmhouse window) will demonstrate how to replace broken antique window glass.

    • Safety first. Put your protective gear on.
    • Remove the window sash and place it on a table or other flat surface.
    • With a heat gun, warm and soften the old putty so that it can be easily removed. Be careful not to burn the wooden sash.
    • Remove the old putty with a putty knife, taking care not to damage the frame.
    • Cleaning out the putty will expose the old glazier’s points. Pry the glazier’s points up.
    • Run the glass cutter diagonally over the glass pane twice creating an X.
    • Gently tap the glass from underneath to break it into pieces that can be easily removed.
    • Remove the old glazier’s points with pliers.
    • Clean and scrape out the remainder of the old putty from the cleared glass channel.
    • After ensuring the window surface is dry, paint the channel with a primer or shellac. Note that regular primer dries in approximately two hours; shellac dries in approximately 10-15 minutes.
    • After the primer or shellac is dry, place new putty inside the channel.
    • Gently press a new glass piece into the opening. Squeeze the putty down by carefully applying even pressure on all four sides of the glass, ensuring a snug fit.
    • Use a framer’s point gun or a putty knife to install one or more glazier’s points in each of the four sides of the opening. The glazier’s points will secure the glass in place.
    • When using the putty knife, gently rock the glazier’s points back and forth until they are properly seated in place.
    • Press more putty around the edges of the glass panel.
    • Using the putty knife, flatten the putty to ensure a snug fit.
    • Place the putty knife at a slight angle in one corner of the glass and run the knife along the side to remove extra putty. Repeat on all four sides.
    • Take a small amount of “whiting” and spread it on the glass. Use a soft brush to rub the whiting on the glass and putty to remove excess oils, then gently clean it off.
    • Wait approximately two weeks for the putty to dry before re-painting the window.

    Good luck with your restoration project! Please view the instructional video at www.restorationglass.com for additional tips and information.

  • ask an expert: caring for hardwood floors

    The Cleveland Plain Dealer‘s always-useful Ask an Expert column dealt this past week with something we all need to be concerned about but often overlook: caring for our hardwood floors.

    Q: I have a beautiful 1925 Craftsman bungalow. The house is blessed with wood floors. I have noticed a black spot near the doorway to the kitchen (a heavy-traffic area) and also in the corner of the family room (a not-so-heavy-traffic area). What are my options in dealing with theses spots? And, more importantly, where do they come from so I can stop them from coming back? There are no leaks anywhere near the spots, and the floor is always dry (except when I mop). Do you have any suggestions on types of cleaners I can use to keep the floors looking shiny and new? I’ve been using Murphy’s Oil Soap. – D.W., Bedford

    A: From Roger Somogyi of Lamb Floor Fashion Center (30840 Lake Shore Blvd., Willowick, 440-943-6722):

    As you know, hardwood floors are natural, beautiful and timeless. Caring and consistent proper cleaning and maintenance will ensure that they remain that way.

    As for the black spots, I would have to assume that it is some type of moisture-related problem, possibly pet urine or mold. With your home being a 1925 vintage, it is likely that whatever has caused the black spots has penetrated the surface, and a plank replacement is the best way to permanently solve the problem. The wood planks that show the spots can be removed, new, unfinished planks can be installed, and the new planks can be custom stained to match the color and finish of your existing floor. A reputable wood repair and refinishing company should be able to help.

    Cleaning techniques vary depending on the type of finish that is on the uppermost layer of the floor, which is called the wear layer. Knowing the type of finish is important to properly clean a wood floor.

    read the entire column with information on caring for a variety of finishes

  • historic window workshop in Sacramento, CA

    Sacramento’s Sierra Curtis Neighborhood Association and the Sacramento Bungalow Heritage Association are fighting a winning battle against cheap, unsightly and – in the long run – inefficient and environmentally damaging vinyl, aluminum and composite windows. Their solution? Fix your old wooden windows before switching over to something that seems like a good deal – but actually isn’t.

    This coming October 6 and 7, they’re offering two workshops on the basic repair, maintenance, weatherization and repair of historic wood windows.

    Volunteer instructors from the community will demonstrate how they worked on their own windows, preserved the character of their historic homes, and saved their pocketbooks!  Historic windows were made to be taken apart and repaired, and with basic guidance, anyone can make their windows work as they originally did – with ease of operation and weather tight – and beautiful!

    We ran a short piece about these workshops and the woman behind them two years ago; again, much thanks to Janice Calpo not only for the heads-up, but more importantly for making Sacramentans aware of the benefits of our old homes’ original windows!