guest post

  • What to Toss, What to Keep: Decluttering Before a Big Move

    Michal-balog-66NaCdBrkCs-unsplash

    Moving to a new home brings excitement, but it also brings stress—especially when it’s time to sort through all your stuff. Most people don’t realize how much they’ve accumulated until they start packing. From dusty boxes in the garage to those “just in case” items stashed in closets, decluttering can feel overwhelming. The good news is, with the right mindset and a clear strategy, you can take the guesswork out of deciding what stays and what goes. This guide helps you confidently let go of clutter while keeping what truly matters. Let’s make your move lighter and your new space clutter-free.

    1. Why Decluttering Before a Move Matters

    Packing is time-consuming. It becomes even more exhausting when you’re hauling around items you don’t need. Decluttering before your move helps you save money, time, and energy. The fewer things you transport, the fewer boxes you’ll pack and unpack. It also helps you start fresh. A clean slate in a new home feels good when it’s not crowded with old, unused belongings. Plus, letting go of clutter gives you mental clarity. Every object you release is one less burden. Decluttering isn’t just about space—it’s about creating room for a better lifestyle, free from unnecessary baggage and stress.

    1. Start With the Least Sentimental Stuff First

    Tackling memories right away can stall your progress. That’s why it’s best to begin with areas that don’t hold emotional value—like junk drawers, expired toiletries, or duplicate kitchen gadgets. As you get used to making quick decisions, you’ll gain confidence to handle more sentimental items later. Getting those easy wins early sets a productive tone. It also keeps the momentum going without burning you out emotionally. If you’ve hired professional help, this is also the phase when local moving services can provide packing guidance based on item categories. Their experience makes it easier to stay focused and efficient.

    1. Ask the Right Questions Before You Keep Anything

    When in doubt, ask yourself: Have I used this in the past year? Would I buy it again? Does it still serve a purpose? These questions cut through sentiment and force practicality. Holding onto an object simply because you might need it “someday” leads to endless clutter. Be honest. If the item has been sitting untouched, chances are it doesn’t serve your life anymore. Also ask if the item fits your future lifestyle. If your new place has no space for bulky furniture or you’re moving to a warmer climate, those heavy coats and snow boots won’t make sense.

    1. Sort Everything Into Four Clear Piles

    Instead of debating endlessly over what to do with each item, use the four-pile method: Keep, Donate, Trash, and Sell. Label boxes or bins clearly and place them in separate rooms if possible. This method prevents decision fatigue and keeps you organized. As soon as you fill a “donate” or “sell” box, remove it from the house. That prevents backtracking and second-guessing. By physically separating your items, you’ll gain clarity on how much you’re actually keeping. Plus, seeing donation and trash piles grow gives a sense of progress. Every item you release lightens your move—and your mental load.

    1. Use the One-Year Rule for Clothes and Shoes

    Most people wear only a fraction of what they own. If you haven’t worn something in the last 12 months, it’s time to say goodbye. The one-year rule is your best friend when cleaning out closets. Be ruthless with items that don’t fit, are out of style, or have damage you never got around to fixing. Also, consider your new home’s climate and storage space. If you’re downsizing or moving somewhere with different weather, adjust your wardrobe accordingly. Holding onto clothes “just in case” wastes space. Keep only what you love and wear. Let the rest go without guilt.

    1. Declutter Room by Room to Stay Focused

    Jumping from one room to another causes distractions and makes the process feel never-ending. Focus on one room at a time to keep things manageable and mentally organized. Start with rooms you use less often, like the guest bedroom or garage. That way, you gain momentum without disrupting your daily life. Within each room, go category by category—clothing, books, décor, and so on. This helps you see how much you actually own in each area. Set daily or weekly goals so you feel accomplished. A clear plan keeps the chaos in check and makes the entire task less draining.

    1. Be Realistic About Sentimental Items

    Emotional attachments make it hard to let go. But keeping every birthday card, stuffed animal, or souvenir doesn’t honor the memory—it only clutters your future. Choose a few meaningful items to represent a time in your life, then release the rest. Take photos of items you feel guilty discarding. That way, you preserve the memory without holding on to the object. Create a memory box for each family member and limit it to that container. This forces you to prioritize what matters most. Honoring the past doesn’t mean dragging all of it into your new beginning.

    1. Digitize What You Can to Save Space

    Papers, photos, and old files can take up more room than you think. Scan important documents and save them securely in the cloud or on an external drive. For photos, use scanning apps or hire digitization services. You’ll protect your memories and reduce the number of boxes. Shred outdated paperwork you no longer need. Don’t move stacks of manuals or utility bills that serve no current purpose. Going digital means your information is easier to access, search, and organize. It also saves you from packing unnecessary paper that weighs down your move—and your storage.

    Decluttering isn’t about perfection—it’s about intention. It’s your chance to decide what deserves a place in your next chapter. Moving offers a rare opportunity to reset your space and lifestyle. By letting go of excess and keeping only what supports your goals, you arrive lighter, freer, and more focused. Your home should reflect who you are now, not who you used to be. Declutter with purpose, and you’ll find that moving doesn’t just change your address—it transforms your outlook. Let your next space be a clean canvas, filled only with what brings clarity, joy, and usefulness.

    partnered post • photo by Michal Balog on Unsplash

  • The “Quiet Luxury” Bathroom: Why Subtle Design Choices Make the Loudest Impact

    Subtlety can speak louder than any bold design statement—especially in the world of home interiors. Nowhere is this more true than in bathroom spaces, where quiet luxury has quickly become the go-to style for homeowners seeking elegance without excess. In cities like Fishers, Indiana—a growing community known for its blend of modern living and small-town charm—discerning homeowners are redefining what it means to have a luxurious bathroom. They want spaces that feel calming, cohesive, and effortlessly elevated, without shouting for attention. Instead of ornate tiles or gilded fixtures, they lean into soft neutrals, curated materials, and purposeful minimalism.

    1. The Power of Simplicity in Design

    Simplicity isn’t boring—it’s intentional. In a quiet luxury bathroom, every detail has a reason to exist. Rather than overwhelming the space with intricate patterns or loud color schemes, the design draws attention to clean lines, soft lighting, and harmonious proportions. This simplicity allows your mind to relax. There’s no visual clutter or unnecessary noise—just a soothing atmosphere that invites you to breathe. Think matte finishes, light-toned woods, and seamless transitions between surfaces. When design becomes about restraint, the beauty of materials and thoughtful layouts shines. Quiet luxury isn’t trying to impress anyone—it just feels right the moment you walk in.

    1. Why Quality Materials Speak Volumes

    It’s not about how much you add—it’s about what you choose. High-end materials play a major role in elevating a space without the need for flash. Natural stone, brushed brass, artisan tilework, and real wood cabinetry provide texture and richness that only improves with age. In places like Fishers, homeowners have embraced this concept, favoring timeless elegance over short-lived trends. That’s why shower remodeling in Fishers has seen a rise in demand for understated, spa-like upgrades. Think large-format stone tiles, frameless glass enclosures, and rainfall showerheads—all designed to create a space that feels indulgent yet grounded. Quality doesn’t need to shout; it simply endures.

    1. Soft Neutrals: The New Statement Color

    Gone are the days when a bold pop of color defined a space. Today’s luxurious bathrooms rely on a palette of calming neutrals—think warm taupes, soft greys, creamy whites, or even the versatile greige. These hues evoke peace and offer a blank canvas for textural elements to stand out. By avoiding sharp contrasts, the entire room flows in harmony, which enhances the sense of spaciousness and calm. Neutrals also allow light to bounce gracefully through the space, especially when paired with natural finishes like limestone or light oak. The result? A bathroom that feels airy, balanced, and designed with a timeless aesthetic that soothes the senses.

    1. Intentional Layouts Over Opulent Add-ons

    Quiet luxury isn’t about stuffing a space with high-end features—it’s about using the space smartly. A thoughtfully planned layout ensures everything has its place, and nothing feels crammed or underutilized. Freestanding tubs, open shelving, and minimalist vanities create breathing room while enhancing functionality. Instead of cramming a dozen gadgets into one room, quiet luxury spaces embrace the “less but better” philosophy. This approach also considers flow—how you move from one area to another, how light enters, and how each element interacts with the next. It’s not about quantity. It’s about curating what’s essential and designing with purpose.

    1. Hidden Technology, Visible Comfort

    Luxury today means blending innovation with invisibility. The best tech upgrades in a bathroom don’t scream for attention—they quietly improve your experience. Heated floors warm your toes on winter mornings. Smart mirrors adjust lighting to suit your routine. Touchless faucets and integrated Bluetooth sound systems blend into the background until you need them. These features elevate daily rituals without taking over the room visually. That’s the beauty of quiet luxury: the most advanced features appear simple. By hiding the tech and highlighting comfort, your bathroom becomes a retreat, not a showroom. The goal is always effortless ease, never forced attention.

    1. Texture as a Silent Hero

    A quiet luxury bathroom doesn’t rely on loud prints or ornate flourishes—it lets texture do the talking. Subtle contrasts in surface materials bring depth without overwhelming the senses. Imagine the pairing of smooth marble countertops with the raw finish of handcrafted tiles, or soft linen curtains draped beside a fluted wood vanity. These tactile elements invite a sense of warmth and authenticity that’s hard to replicate with color or pattern alone. Even a honed stone floor or a micro-cement wall can become the focal point when used thoughtfully. Texture brings the design to life while maintaining a serene, understated elegance.

    1. Lighting That Warms, Not Blinds

    Lighting can make or break a bathroom’s mood. Quiet luxury embraces light that flatters and soothes rather than demands attention. Instead of harsh overheads, these bathrooms use layered lighting—wall sconces, backlit mirrors, and soft-glow ambient options—to build a comforting atmosphere. Dimmer switches and tunable LEDs allow homeowners to adjust lighting based on the time of day or activity. This level of control helps promote relaxation while still providing functionality. Warm color temperatures and strategic placements highlight natural finishes and create cozy visual zones. In this setting, light doesn’t just brighten the space—it enriches the feeling of calm and quiet confidence.

    1. Storage that Disappears into the Design

    Clutter is the enemy of calm. That’s why hidden, efficient storage plays such a vital role in quiet luxury bathrooms. Recessed niches in showers, vanity drawers with built-in organizers, and mirror cabinets that blend seamlessly into the wall all help keep the space orderly. Storage should serve a purpose while disappearing into the background. Tall linen cabinets with soft-close doors or floating vanities with concealed compartments offer plenty of room without interrupting the design flow. The goal is to eliminate visual noise. With the right storage solutions, even the most frequently used items remain out of sight but always within reach.

    Quiet luxury proves that you don’t need to go big to create something memorable. With careful attention to materials, layout, lighting, and personal meaning, a bathroom can become the most tranquil and refined room in the home. It’s a design philosophy built not on trends but on timelessness—spaces that feel calm, beautiful, and lived-in. In a fast-paced world, the quiet bathroom reminds us to slow down, simplify, and savor the little luxuries. The true mark of elegance isn’t in what you add—but in what you choose to leave out. And that restraint speaks volumes.

    partnered post • photo by Billy Jo Catbagan on Unsplash

  • Custom Furniture by Joel Liebman

    Joel Liebman, along with his various shop dogs, creates stunning, nearly all custom-made works of art and craftsmanship. Joel, who received formal training at the Genoa School in the late 1980s, now operates from a studio on the third floor of a historic New England millhouse in Easthampton, Massachusetts, which has been converted into artist spaces. Much of his work is influenced by the angles and sleek lines of Streamline Moderne and Deco styles, making it as fitting for the 1930s as it is for today. However, Joel’s versatility goes beyond just one aesthetic. His skillful integration of various materials—wood, glass, and leather—along with his exceptional craftsmanship as a cabinetmaker, sets his work apart. I’m particularly struck by his original Craftsman designs.

  • Why Blurring the Lines Between Indoor and Outdoor Spaces Makes Sense

    Curtis-house-blue

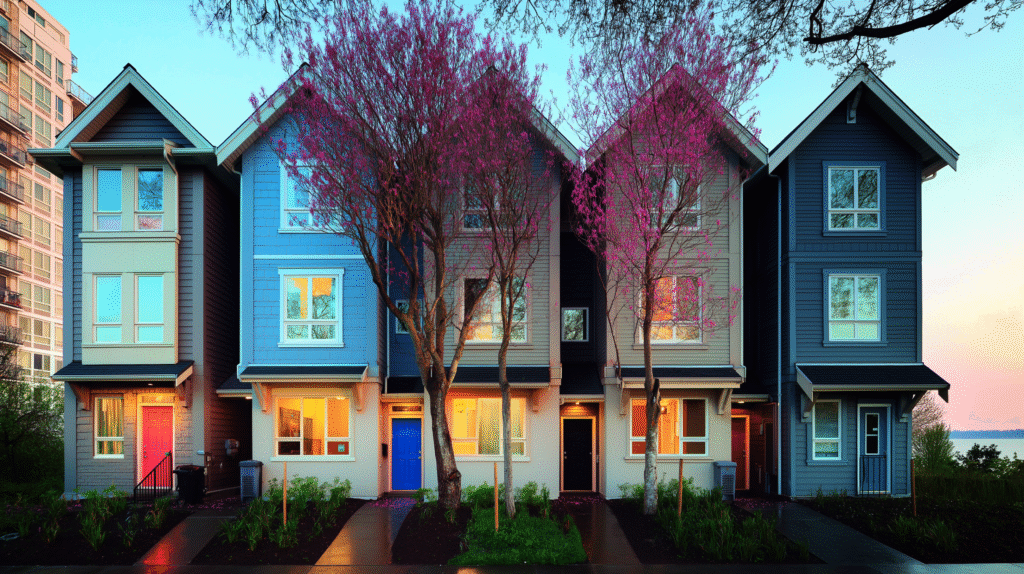
    Homes should feel open, bright, and inviting, yet many designs still keep indoor and outdoor areas completely separate. Why stick to strict boundaries when you can create a seamless flow between the two? More people are realising that combining indoor and outdoor spaces makes a home feel bigger and also makes daily life more enjoyable.

    Imagine having breakfast with the fresh morning air drifting in or enjoying the sunset from the comfort of your sofa. A well-connected home allows for better use of space, more natural light, and a closer connection to nature. Instead of keeping the outdoors as something you step into only occasionally, bringing it into your daily routine makes a home feel more flexible, comfortable, and fun to live in.

    Enhancing Outdoor Views and Safety with Modern Glass 

    A balcony should feel like an extension of the home, not an afterthought. Yet, many traditional railings block views and make outdoor areas feel small and closed off. Wouldn’t it be better to enjoy an open, unobstructed view while still feeling secure? That’s where glass balustrades come in. They provide safety without the bulky look of traditional barriers, allowing the outdoors to feel closer while keeping the design modern and stylish.

    Many homeowners work with Class Glass Limited to install balcony and balustrade glass solutions that offer both protection and a sleek finish. Glass balustrades let in more light, give outdoor spaces a contemporary touch, and make small areas feel larger. Whether it’s a city skyline, a garden, or a peaceful backyard, having a clear view makes a big difference. With strong materials and expert installation, glass features create a seamless transition between indoor and outdoor spaces while keeping safety a priority.

    Expanding Living Areas for a More Versatile Home

    Why let outdoor space go unused when it can become part of the home? Extending indoor areas into outdoor patios, decks, or terraces makes a home feel bigger without adding extra rooms. With the right design, the outside becomes just as comfortable as the inside.

    A well-connected space allows for more entertaining, more relaxation, and more flexibility. Rather than being stuck inside on a nice day, a flowing layout makes it easy to move between indoor and outdoor areas. Sliding doors, covered patios, and cosy seating areas turn outdoor spaces into an extension of the home. So, whether it’s a family meal or a lazy afternoon, there’s always a perfect spot to enjoy it.

    Improving Natural Light and Ventilation

    Nothing beats a home filled with warm, natural light, yet many houses rely too much on artificial lighting. Why not let the sun do the work? Large windows, open layouts, and glass doors let sunlight travel further into the home, making every room feel brighter and more inviting. 

    Ventilation is just as important. A house that lets fresh air flow freely feels fresher and more comfortable all year round. No one likes a stuffy home, and a well-planned indoor-outdoor connection keeps air moving naturally. Whether it’s a gentle breeze on a warm day or simply reducing indoor humidity, having large openings, courtyard layouts, or airflow-friendly designs makes a home cooler, fresher, and more pleasant to live in.

    Creating a Healthier and Happier Living Environment

    Spending time outdoors has a positive impact on well-being, so why not bring some of that into the home? A living space that flows easily between the indoors and outdoors makes fresh air, greenery, and natural light part of daily life without extra effort.

    Features like open-air lounges, garden courtyards, or even just a reading nook near a bright window help create a more relaxing, uplifting home environment. Being close to nature, even in small ways, can make a home feel more refreshing and enjoyable every single day.

    Reducing the Need for Artificial Lighting/Cooling

    Homes designed to connect indoor and outdoor spaces let in more sunlight, reducing the need for artificial lighting during the day. This helps cut down on energy use while keeping the home feeling bright and fresh.

    A well-ventilated home also stays cooler without relying on air conditioning all the time. Large windows, sliding doors, and open-air layouts allow natural airflow, keeping rooms comfortable without excessive cooling costs.

    Bringing Nature Closer to Everyday Living

    Spending time in nature has always been refreshing, but why wait for a trip to the park when you can bring greenery right into your home? Indoor outdoor living makes it easier to enjoy the calming effect of plants, fresh air, and natural textures without stepping too far from daily comforts. 

    Adding indoor plants, water features, or natural materials like wood and stone helps blur the line between inside and outside. Large windows that frame beautiful outdoor views make a space feel more open, while patio areas with comfy seating invite people to spend more time outdoors.

    Creating a Seamless Entertainment Space

    Entertaining at home is always fun, but having limited space indoors can make it feel cramped. Why not extend the party outside? A well-designed indoor-outdoor setup allows guests to move freely, making gatherings feel more relaxed and enjoyable. This way, hosts can cook while still being part of the conversation, and guests can enjoy fresh air without feeling disconnected from the main event.

    Features like outdoor kitchens, cosy seating areas, and sliding doors that open fully make a home feel more inviting and interactive. Whether it’s a weekend barbecue, a quiet dinner with friends, or just lounging with a book, a space that merges indoors and outdoors creates the perfect setting for any occasion.

    Making the Most of Every Season

    A great indoor-outdoor design means the home can be enjoyed all year round. Whether it’s soaking up the sun in summer or staying cosy outside in cooler months, a home that connects the indoors and outdoors creates more usable space in any weather.

    Retractable awnings, heaters for outdoor areas, covered patios, and shaded pergolas make it easy to adjust the space to match the season. Instead of only using the garden when the weather is perfect, a well-designed transition between indoor and outdoor areas means it can be enjoyed no matter what.

    Blurring the lines between indoor and outdoor spaces makes everyday life more enjoyable, whether it’s relaxing, entertaining, or simply enjoying a brighter, fresher environment. With modern glass features, open layouts, and natural design elements, a home can feel bigger and more inviting without sacrificing warmth and cosiness. If you live in Huntington, just make sure you're up to date with all the deck requirements.

     partnered post • image by Curtis Adams at Pexels 

  • Marble vs. Quartz: Which Countertop is Right for You?

    Marble vs. Quartz: Which Countertop is Right for You?

    Moehong_comparing_countertop_materials_marble_vs._quartz_colorf_56fd4320-0939-49ce-b7a7-a8015b36a9de

    When it comes to choosing the perfect countertop material for your home, the debate between marble vs. quartz is a common one. Both materials are popular for their beauty and functionality, but they cater to different needs and preferences. Whether you’re renovating your kitchen, upgrading your bathroom, or simply exploring options, this guide will help you understand the key differences, benefits, and considerations to make an informed decision. Let’s dive into the world of marble and quartz to find out which one suits your lifestyle and design goals.

    What is Marble?

    Marble is a natural stone formed from limestone under intense heat and pressure. Known for its timeless elegance and unique veining patterns, marble has been a symbol of luxury for centuries. It’s a favorite choice for homeowners who want to add a touch of sophistication to their spaces.

    Key Features of Marble:

    • Aesthetic Appeal: Marble's natural veining and soft, elegant colors make it a stunning choice for countertops, flooring, and decorative accents.
    • Heat Resistance: Marble stays cool, making it ideal for baking and pastry preparation in kitchens.
    • Unique Patterns: No two marble slabs are exactly alike, offering a one-of-a-kind look. 

    What is Quartz?

    Quartz is an engineered stone made from approximately 90-95% crushed natural quartz and 5-10% resins and pigments. It’s designed to combine the beauty of natural stone with the durability and low maintenance of modern materials. Quartz is a popular choice for busy households and high-traffic areas.

    Key Features of Quartz:

    • Durability: Quartz is highly resistant to scratches, chips, and stains, making it a practical choice for kitchens and bathrooms.
    • Low Maintenance: Unlike natural stone, quartz doesn’t require sealing and is easy to clean with mild soap and water.
    • Consistent Patterns: Quartz offers a wide range of colors and patterns, including options that mimic the look of natural stone like marble.

    Marble vs. Quartz: Key Differences

    To help you decide between marble and quartz, let’s compare them across several important factors.

    Appearance 

    • Marble: Known for its elegant veining and smooth, polished finish, marble exudes luxury and sophistication. It’s perfect for creating a classic or high-end look.
    • Quartz: Offers a more uniform appearance with consistent patterns. It’s available in a variety of colors and styles, including designs that replicate the look of marble.

    Durability

    • Marble: Requires regular sealing and immediate cleaning of spills to prevent staining. Avoid acidic cleaners to maintain its finish.
    • Quartz: Highly durable and non-porous, quartz is resistant to scratches, stains, and heat. It’s a better choice for high-use areas. 

    Maintenance

    • Marble: Requires regular sealing and immediate cleaning of spills to prevent staining. Avoid acidic cleaners to maintain its finish.
    • Quartz: Low maintenance when properly sealed. Regular cleaning with mild soap and water is usually sufficient.

    Cost

    • Marble: Generally more expensive due to its luxurious appeal and limited availability.
    • Quartz: More affordable and widely available, making it a budget-friendly option for many homeowners.

    Applications

    • Marble: Ideal for low-traffic areas like bathroom vanities, fireplace surrounds, and decorative accents.
    • Quartz: Perfect for high-traffic areas like kitchen countertops, flooring, and outdoor spaces.

    Which Should You Choose: Marble or Quartz?

    The choice between marble and quartz ultimately depends on your lifestyle, budget, and design preferences. Here’s a quick guide to help you decide.

    • Choose Marble If: You prioritize aesthetics and are willing to invest in regular maintenance. Marble is perfect for creating a luxurious, timeless look in spaces that don’t see heavy use.
    • Choose Quartz If: You need a durable, low-maintenance material that can withstand daily wear and tear. Quartz is ideal for busy households and high-traffic areas.

    Environmental Impact: Marble vs. Quartz?

    When choosing between marble and quartz, it’s worth considering the environmental impact of each material. Both have their pros and cons in terms of sustainability.

    • Marble: As a natural stone, marble is eco-friendly in terms of its composition. However, quarrying marble can be energy-intensive and may result in significant waste.
    • Quartz: While quartz is an engineered material, many manufacturers use recycled materials in its production. However, the manufacturing process can be resource-intensive.

    Best Uses for Marble and Quartz

    Best Uses for Marble

    Marble’s timeless beauty and luxurious appeal make it a favorite for creating elegant, high-end spaces. However, its softer and more porous nature means it’s better suited for certain applications. Here are the best uses for marble:

    1. Bathroom Vanities

    • Why: Marble’s natural veining and smooth finish add a touch of luxury to bathroom spaces. Its cool surface feels great in a bathroom setting.
    • Tip: Use marble for vanity tops, shower walls, or flooring to create a spa-like atmosphere.

    2. Fireplace Surrounds

    • Why: Marble’s heat resistance and elegant appearance make it a perfect choice for fireplace surrounds. It can transform a simple fireplace into a stunning focal point.
    • Tip: Pair marble with neutral tones to enhance its natural beauty.

    3. Decorative Accents

    • Why: Marble’s unique patterns and colors make it ideal for decorative pieces like tabletops, shelves, or wall cladding.
    • Tip: Use marble accents to add a touch of sophistication to living rooms or entryways.

    4. Baking Stations

    • Why: Marble stays cool, making it perfect for baking and pastry preparation. It’s often used in kitchen islands or dedicated baking areas.
    • Tip: Keep marble baking stations away from high-traffic areas to minimize wear and tear.

    Best Uses for Quartz

    Quartz’s durability, low maintenance, and versatility make it a practical choice for high-traffic areas and modern designs. Here are the best uses for quartz:

    1. Kitchen Countertops

    • Why: Quartz is highly resistant to scratches, stains, and heat, making it ideal for busy kitchens. Its non-porous surface is also hygienic and easy to clean.
    • Tip: Choose quartz in neutral tones for a timeless look or bold colors for a modern vibe.

    2. Bathroom Countertops

    • Why: Quartz’s resistance to moisture and stains makes it a great choice for bathroom countertops. It’s also available in a wide range of colors and patterns.
    • Tip: Pair quartz countertops with marble accents for a luxurious yet practical bathroom design.

    3. Flooring

    • Why: Quartz’s durability and scratch resistance make it suitable for high-traffic areas like hallways, living rooms, and kitchens.
    • Tip: Opt for textured finishes to prevent slipping in wet areas.

    4. Outdoor Kitchens

    • Why: Quartz is highly resistant to weathering, making it a great choice for outdoor kitchens and bar tops.
    • Tip: Ensure the quartz is rated for outdoor use to avoid discoloration from UV exposure.

    5. Commercial Spaces

    • Why: Quartz’s durability and low maintenance make it a popular choice for restaurants, hotels, and office spaces.
    • Tip: Use quartz in high-traffic areas like reception desks or conference tables.

    Resale Value: Marble vs. Quartz?

    If you’re considering the long-term value of your investment, it’s important to think about how marble and quartz might impact your home’s resale value. Both materials are highly desirable, but they appeal to different types of buyers.

    • Marble: Marble is often associated with luxury and high-end design. Homes with marble features, such as countertops or flooring, can attract buyers looking for a premium, elegant aesthetic. However, some buyers may be wary of marble’s maintenance requirements, which could slightly limit its appeal.
    • Quartz: Quartz is a popular choice among homebuyers due to its durability and low maintenance. It’s often seen as a practical and stylish option, making it a safe bet for increasing resale value. Quartz countertops, in particular, are a sought-after feature in kitchens and bathrooms.

    The Installation Process for Indoor Use: Marble vs. Quartz?

    The installation process for marble and quartz differs due to their unique properties. Here’s a breakdown of what to expect.

    Marble Installation: 

    • Precision is Key: Marble’s natural veining and patterns require careful planning to ensure the final installation looks cohesive. Professionals often take extra time to align the veining for a seamless appearance.
    • Fragility: Because marble is softer and more prone to chipping, measurements and templating must be extremely accurate to minimize the need for adjustments during installation.
    • Sealing: Marble requires sealing during and after installation to protect it from stains and damage.

    Quartz Installation: 

    • Easier Process: Marble’s natural veining and patterns require careful planning to ensure the final installation looks cohesive. Professionals often take extra time to align the veining for a seamless appearance.
    • No Sealing Required: Quartz is non-porous, so it doesn’t require sealing during or after installation.
    • Consistent Patterns: Quartz’s uniform appearance makes it easier to template and install without worrying about visible seams.

    FAQs

    1. Is marble more expensive than quartz?

    Yes, marble is generally more expensive than quartz due to its luxurious appeal and limited availability. However, prices can vary depending on the type, color, and origin of the stone.

    2. Can you use marble in the kitchen?

    Yes, you can use marble in the kitchen, but it requires extra care. Marble is prone to staining and etching, so it’s best suited for areas with light use, such as baking stations or islands.

    3. How often do you need to seal quartz?

    Quartz doesn’t require sealing because it’s non-porous. Regular cleaning with mild soap and water is sufficient to maintain its appearance.

    partnered post • image by midjourney

  • Timber Frame Architects: Building Vision with Precision and Expertise

    Wood-log-frame-pic

    Building Your Dream Timber Frame Home: A Beautiful, Sustainable Choice

    If you're exploring options for building your dream home, you may want to put timber frame homes on your research list. Known for its timeless beauty, strength, and eco-friendliness, timber frame homes are becoming increasingly popular among those seeking a unique and sustainable living space. In this article, we’ll explore why these homes are on the rise and how they stand out from conventional construction.

    What Makes Timber Frame Homes Unique?

    Designed for You

    Timber frame homes are all about personalization. Whether you want a cozy mountain retreat or an open-concept modern home, skilled architects and builders can turn your vision into reality. One homeowner shared how their timber frame architects incorporated a vaulted ceiling and exposed beams into their bonus room, creating the perfect gameroom and hangout space for their family of 6. These homes are crafted to reflect your lifestyle and preferences, blending functionality with aesthetics.

    A Perfect Mix of Tradition and Innovation

    Timber frame construction draws from centuries-old techniques while embracing modern design. These homes often feature exposed wooden beams paired with contemporary elements like large windows or sleek interiors. This seamless blend of tradition and innovation creates spaces that are as practical as they are stunning. Timber frames are not just homes—they’re works of art designed to last for generations.

    The Advantages of Timber Frame Homes

    Durable and Long-Lasting

    Timber frame homes are built to endure. Using heavy wooden beams and precise joinery, these structures can stand strong for centuries. Unlike stick-built homes, timber frame designs are more resilient to environmental stresses like heavy snow or strong winds. In fact, research shows that timber frames have a longer lifespan than many other construction methods, making them a wise investment for the long term.

    Visually Striking

    Timber frames are undeniably beautiful. The natural warmth of exposed wood creates a cozy, inviting atmosphere, while the craftsmanship of the beams adds character to every room. Whether you prefer a rustic, cabin-like aesthetic or a sleek, modern design, timber frames can adapt to match your style. One homeowner described their timber frame house as "a home that feels alive," thanks to the interplay of natural materials and thoughtful design.

    Sustainability in Timber Frame Construction

    Eco-Friendly Materials

    Timber frame homes are a sustainable choice because they use renewable resources. Timber is biodegradable, recyclable, and contributes to carbon sequestration—trees absorb carbon dioxide as they grow, storing it within the wood. By using timber in construction, you’re making an environmentally responsible decision that helps reduce your home’s carbon footprint.

    Energy Efficiency

    Timber frames are naturally energy-efficient. Wood’s insulating properties keep your home warm in the winter and cool in the summer. In fact, timber frame homes often save homeowners up to 30% on energy costs compared to conventional builds. Large windows, a common feature in timber frame designs, also let in plenty of natural light and improve ventilation, further reducing the need for artificial lighting and cooling.

    How Timber Frames Compare to Conventional Homes

    Design Flexibility

    One of the most significant advantages of timber frame homes is their design flexibility. Because they don’t rely on interior load-bearing walls, timber frames allow for open floor plans and unique layouts. Imagine a spacious living area that flows seamlessly into your kitchen or a lofted bedroom overlooking a great room—it’s all possible with timber framing.

    Built to Last

    While conventional homes might show wear and tear over time, timber frame structures maintain their integrity for decades, even centuries. Their strength and durability make them a practical choice, particularly in areas prone to extreme weather. Timber frames are not just homes; they’re legacy structures that can be passed down to future generations.

    Building a Home That Reflects Your Values

    Choosing a timber frame home is about more than just style—it’s a statement about what you value. Timber frames offer a chance to live sustainably without compromising on beauty or comfort. Whether you're drawn to their eco-friendly nature, their striking design, or their unmatched durability, these homes provide a unique way to align your living space with your principles.

    Why Work with a Timber Frame Designer?

    Expert Guidance

    The success of your timber frame home starts with choosing the right architect or builder. Look for professionals with a strong portfolio and glowing customer reviews—they’ll guide you through the process, from initial designs to the final build. Collaboration is key during this phase. By sharing your vision and staying involved, you’ll ensure that every detail is tailored to your needs.

    Efficient and Precise Construction

    Modern advancements in timber frame construction mean faster build times and minimal waste. Precision engineering ensures that every piece of wood is used efficiently, reducing construction waste and keeping costs manageable. You’ll get a home that’s not only beautiful but also built with care and precision.

    Why Now Is the Time for Timber Frame Homes

    Timber frame homes are experiencing a renaissance, and it’s easy to see why! Their timeless appeal, sustainable design, and energy efficiency make them a standout choice for today’s environmentally conscious homeowner. Whether you’re looking to build a cozy family retreat or a modern showpiece, timber frame construction offers the perfect blend of tradition and innovation.

    If you’ve ever dreamed of living in a home that combines natural beauty, lasting durability, and eco-friendly practices, a timber frame home might be just what you’re looking for. Reach out to a trusted architect or builder to start bringing your vision to life. With timber framing, you’re not just building a house—you’re creating a home with character, history, and heart.

    partnered post • client image

  • 4 Tips for Fireplace Maintenance in Rental Properties

    Moehong_logs_burning_in_brick_fireplace_logo_--ar_43_--style_ra_92156e97-a96b-46b0-8a1a-b6099e6d6024

    Add more charm and warmth to your rental apartment by setting up your fireplace. As long as you don’t have carpet flooring, a well-kept fireplace is an excellent way to keep your tenants, especially with the festive season around the corner. However, it also requires a lot of work, and without proper maintenance, it can quickly take your house from cozy to ashy and dirty. That’s why we’ve put together 4 tips to help you get the most out of your fireplace. Also, continue reading around till the end to find out some important details you should consider adding to your lease: 

    4 Tips for Fireplace Maintenance in Rental Properties

    • Conduct an Annual Chimney Inspection

    Keep the exit for the smoke your fireplace emits clear all year round by conducting an annual chimney inspection. Aside from ensuring that Santa has a safe space to crawl through, a chimney inspection can help you spot potential hazards like a creosote buildup. This tar-like substance is extremely flammable, but unavoidable because it's one of the bi-products of burning wood. In other words, if you don’t clean it out regularly, the creosote buildup could start a chimney fire or prevent toxic gas like carbon monoxide from escaping.  

    • Clean the Fireplace Regularly

    Arrange for professional cleaners to wipe down your chimney regularly, especially during winter when it sees a lot of use. Experts recommend opting for weekly cleanings during frequent use, but if you only use your fireplace occasionally, then a monthly sweep should do. It’s essential to clarify who is responsible for the task, to ensure it actually gets done. Open communication is important for landlords and tenants when preparing for emergencies, and while fireplace maintenance may not constitute an immediate emergency, poor upkeep could easily become a health hazard. 

    • Use the Right Wood

    Be particular about the kind of wood you burn in your fireplace. Instead of settling for the cheapest log you find, opt for dry seasoned wood like oak or maple. These hardwoods contain less moisture, burn more efficiently, and produce less creosote residue. On the other hand, softwoods like pine and fir create way more smoke and creosote, which can make cleaning more tedious. How you store your firewood is also important, so keep it in a well-ventilated area that’s free of dampness and moisture. 

    • Install Carbon Monoxide Detectors

    Prioritize having safety features that can alert you when something goes wrong. Aside from keeping your property safe, it also ensures you don’t compromise your tenants’ health. Carbon monoxide is a deadly odorless and tasteless gas, and without the right sensors in place, you could poison your renters’ airways and put them at risk of developing respiratory diseases or even death. That’s why it’s not enough to buy the right type of wood or clean your chimney regularly, you still need to install functional fire and carbon monoxide detectors.  

    Important Details to Add in your Lease About Fireplace Maintenance

    • Outline Responsibilities

    Specify whether your tenants are responsible for cleaning the fireplace in your rental agreement. It would be best to ensure everyone is on the same page from the start, so if you expect your renters to schedule and complete routine cleaning, let them know from the start. You should also highlight the frequency of cleaning and products they should use. Otherwise, if you’re taking on the role yourself, simply give them a heads-up on how often to expect a cleaner. Also, provide clear instructions on how they can report issues with the fireplace immediately. You can even give them a list of things to look out for such as unusual odors, smoke issues, or visible damage. 

    • Clarify Restrictions on Usage

    Encourage tenants with fireplaces to practice fire prevention. Beyond clarifying who does the cleaning or pays for damages, it would help if you highlighted when and how your renters can use the fireplace. Don’t assume that everyone knows the basics, or that they’ll even be willing to Google it. Instead, take their education into your own hands by sharing information on what type of wood to use, reminders to check the batteries in the carbon monoxide detectors, and including emergency contact for your local fire department. 

    Conclusion 

    Keep your rental property warm and cozy by taking good care of your fireplace. With winter around the corner, tenants are more likely to want to curl up beside a hearty fire, especially with the festive season around the corner. That means there’s no better time than now to conduct your annual chimney inspection and remember to schedule routine cleaning while you’re at it. Using the right wood and installing carbon monoxide sensors can also go a long way in ensuring your tenants’ safety. Also, it would be a good idea to outline tenant and landlord responsibilities in your lease and clarify any restrictions on usage, so everyone plays their part in maintaining the fireplace.

    partnered post • image by Midjourney

  • Discover the Perfect Flooring Solutions for Your Home

    Screenshot 2024-11-05 at 9.18.19 AM

    Choosing the right flooring for your home can be a transformative experience. It sets the tone for your interior design and enhances the overall ambiance of your living space. Whether you're aiming for a cozy, rustic look or a sleek, modern finish, the type of flooring you select plays a crucial role. In this article, we'll explore different flooring options, their benefits, and how to choose the best one for your needs.

    Understanding Different Types of Flooring

    Hardwood Flooring

    Hardwood flooring is popular for its durability and classic aesthetic. It offers natural beauty and warmth, often increasing the value of your home. Hardwood is available in various styles, including oak, maple, and cherry, each with unique colors and grain patterns.

    Benefits of Hardwood Flooring:

    • Long-lasting and can be refinished multiple times
    • Easy to clean and maintain
    • Timeless appeal that complements many interior styles

    Considerations:

    • Can be susceptible to scratches and moisture damage
    • May develop gaps over time due to expansion and contraction

    Laminate Flooring

    Laminate flooring resembles hardwood but is more budget-friendly. It's made of multiple layers and often features a photographic layer miming wood or stone.

    Benefits:

    • Cost-effective alternative to hardwood
    • Scratch-resistant and easy to install
    • Variety of designs and finishes

    Considerations:

    • Not as durable as hardwood
    • Cannot be refinished

    Vinyl Flooring

    Vinyl has emerged as a versatile and resilient option for homeowners. It's available in sheets, tiles, or planks and can replicate the look of wood, stone, or tile.

    Benefits:

    • Water and stain-resistant
    • Soft underfoot and quieter than hardwood
    • Wide range of patterns and colors

    Considerations:

    • Exposure to sunlight can fade vinyl over time
    • High-quality options can be as expensive as hardwood

    Carpet Flooring

    Carpet provides warmth and comfort, making it ideal for bedrooms and living areas. Available in many textures and colors, it's a cozy home choice.

    Benefits:

    • Soft and comfortable
    • Provides insulation and reduces noise
    • Affordable and easy to install

    Considerations:

    • May harbor allergens and requires regular cleaning
    • Prone to staining and wear

    Factors to Consider When Choosing Flooring

    When selecting flooring, it's important to evaluate the unique needs of each space in your home. Here are key factors to consider:

    1. Room Use: Choose flooring that suits the room's purpose. For instance, water-resistant options are best for kitchens and bathrooms.
    2. Aesthetic Preference: Consider your home's overall design style. Do you prefer a rustic, traditional feel or a modern, sleek look?
    3. Maintenance: Evaluate how much time and effort you're willing to invest in upkeep. Some floors require more maintenance than others.
    4. Budget: Flooring prices vary widely. Determine your budget to help narrow down choices.
    5. Traffic and Durability: High-traffic areas require durable materials. For less frequented rooms, you might prioritize aesthetics over durability.

    Expert Tips for Flooring Installation

    Installing flooring can be a straightforward process if planned properly. Here are some expert tips to ensure a successful installation:

    • Hire Professionals: While DIY installation can be tempting, hiring professionals ensures precision and saves time.
    • Prepare the Subfloor: Ensure the subfloor is clean, dry, and level before installation. This step is crucial for a seamless finish.
    • Acclimate Materials: Allow hardwood and laminate to acclimate to your home's humidity before installation to prevent warping.
    • Use Quality Underlayment: Don't skimp on underlayment, as it provides cushioning and soundproofing.

    Cost Comparison Table

    Here’s a quick look at the average costs for various flooring types:

    flooring type

    average cost / sq. ft.

    Hardwood

    $5 – $10

    Laminate

    $2 – $5

    Vinyl

    $2 – $7

    Carpet

    $1 – $4

    Prices can vary based on material quality and installation location.

    Flooring: Local Insights

    If you’re in the market for flooring St George Utah offers a variety of options tailored to desert climates and local design preferences. Local experts can provide valuable insights into materials that thrive in the region's unique environmental conditions.

    Final Thoughts on Selecting Flooring for Your Home

    Choosing the right flooring is a significant decision that impacts the functionality and style of your home. Consider the room's purpose, your aesthetic preferences, and your budget carefully. Whether you opt for the timeless elegance of hardwood, the affordability of laminate, or the resilience of vinyl, there's a perfect flooring option for every space. Engage with local professionals to ensure you make informed decisions and enjoy your flooring for years to come.

    partnered post • image by midjourney

  • Top Security Systems for Apartments and Small Homes

    0_0

    When it comes to securing an apartment or small home, choosing the right security system is essential. Compact spaces have unique requirements that differ from larger homes, and fortunately, there are many security solutions designed specifically for apartments and smaller residences. Here’s a guide to some of the best security systems and devices that are easy to install, affordable, and effective for small spaces.

    1. SimpliSafe Home Security System

    SimpliSafe is a popular choice for renters and homeowners alike due to its affordability, flexibility, and ease of installation. With no hardwiring required, SimpliSafe is ideal for apartments and smaller homes. The system includes entry sensors, motion detectors, and optional cameras, allowing you to tailor the setup to your space’s unique needs. SimpliSafe’s professional monitoring service is optional, making it a flexible option for those who want added security without a long-term contract.

    1. Ring Alarm Security Kit

    The Ring Alarm system is another excellent choice for apartments and small homes, especially for those who already use other Ring products. The system includes a base station, keypad, contact sensors, and motion detectors, all of which can be easily installed without drilling or extensive setup. Ring’s professional monitoring plan is competitively priced and offers integration with the Ring doorbell and camera systems, allowing you to create a cohesive security network for your home. According to The New York Times, Ring is one of the most trusted brands in home security, thanks to its user-friendly design and reliable functionality.

    1. Wyze Home Monitoring

    Wyze offers an affordable home monitoring system that provides quality security on a budget. The system includes door/window sensors, a motion sensor, and a keypad that can be controlled via the Wyze app. Wyze also offers a subscription plan for professional monitoring, making it a great low-cost solution for apartment dwellers. With easy installation and smart home integration, Wyze is a good option for those who want basic security without a high price tag.

    1. Arlo Pro 4 Security Cameras

    While it’s not a full security system, the Arlo Pro 4 camera can be a powerful deterrent on its own. The camera offers high-definition video, night vision, and two-way audio, making it suitable for monitoring your apartment’s entrances. Arlo Pro 4 is a wireless camera, so it’s easy to install and can be placed both indoors and outdoors. Additionally, you can view real-time footage and receive alerts on your phone. CNN recently noted that standalone security cameras like the Arlo Pro 4 are effective in deterring intruders and provide excellent evidence if an incident occurs.

    1. ADT Self Setup

    For those who prefer a more comprehensive security system, ADT’s self-setup option combines the power of a professionally monitored system with the ease of DIY installation. ADT Self Setup includes sensors, cameras, and a central hub that connects to ADT’s monitoring network. The system offers flexibility and is ideal for apartments because it doesn’t require hardwiring, and all components are easy to install and move if you change residences. ADT’s longstanding reputation as a reliable security provider makes it an attractive option for small-space living.

    1. Abode Security Kit

    Abode is a highly customizable home security system that’s renter-friendly and works well in small homes and apartments. The system offers both self-monitoring and professional monitoring options and integrates seamlessly with other smart home devices, including Amazon Alexa, Google Assistant, and Apple HomeKit. The Abode Security Kit includes door sensors, motion detectors, and a central hub, all designed for easy DIY installation. Abode’s flexibility and integration options make it a strong contender for small living spaces that require adaptable security.

    1. Canary All-in-One Security System

    Canary’s All-in-One Security System combines a camera, siren, and air quality monitor in a single device, making it ideal for apartments where space is limited. The system is easy to set up and requires no complex installation. With the Canary app, you can view live footage, receive alerts, and monitor air quality in your home. This all-in-one approach offers comprehensive security while taking up minimal space.

    1. Frontpoint Security System

    Frontpoint is a DIY home security system known for its user-friendly setup and extensive features. Designed for both small homes and apartments, Frontpoint includes a range of sensors, cameras, and a mobile app for remote access. Frontpoint’s monthly monitoring plan is optional, allowing you to decide if you want professional monitoring or prefer to self-monitor. For added security, homeowners can look into supplies for lock upgrades and modifications through a reliable locksmith supply store that offers trusted products to reinforce doors and windows.

    1. Smart Door Locks for Added Security

    While not a complete security system, smart door locks are an excellent addition to any apartment or small home. Brands like August, Schlage, and Yale offer locks that can be controlled remotely through smartphone apps. Smart locks allow you to lock and unlock your door from anywhere, grant temporary access to guests, and monitor who enters and exits your home. This extra level of security is particularly beneficial for renters who may not be able to make significant changes to the property.

    1. Window and Door Sensors

    For apartments and small homes where a full security system might feel excessive, simple window and door sensors can provide significant security benefits. These sensors alert you when a door or window is opened, providing an immediate alert to potential unauthorized access. These devices are affordable, easy to install, and work well in conjunction with other security measures, such as cameras or alarms.

    In conclusion, selecting the right security system for an apartment or small home doesn’t have to be overwhelming. The options above provide a range of solutions for different needs, budgets, and security levels. By combining smart locks, cameras, and monitoring services, you can create a robust security setup tailored to your space. With the right tools and setup, you’ll have peace of mind knowing that your home is secure, regardless of its size.

    partnered post • image by midjourney

  • HOA Responsibilities for Water Damage

    Cleanup

    In residential communities, Homeowners' Associations (HOAs) are organizations in charge of overseeing and maintaining common spaces and facilities. They are important when it comes to making sure the community is well maintained and protecting property values. However, water damage is one of the problems that HOAs frequently deal with because it can seriously affect both individual properties and the community.

    Water damage can be a major headache for homeowners, especially when it affects a property under the management of a Homeowners' Association (HOA). It can cause confusion and disputes about who is responsible for what. In these situations, it becomes essential to comprehend the role of the homeowners' association and their particular responsibilities. HOAs frequently implement rules and procedures to handle problems with upkeep and repairs, including water damage. Whether you’re a homeowner facing a water damage issue or seeking clarity on HOA responsibility for water damage, read along as this article discusses everything you need to know about HOA’s duties regarding water damage.

    Shared Responsibility for Water Damage 

    Responsibilities of HOA vs Homeowners

    Water damage is a complex issue in communities managed by homeowners’ associations (HOA). Common areas such as exterior walls, roofing systems, and plumbing systems serving several units being infiltrated by water are normally repaired and maintained by HOA.

    Homeowners are responsible for the interior maintenance of their properties. Personal appliances, plumbing, or other internal sources that cause a leak that should be fixed. Work with a reliable Richmond rental property manager to conduct regular inspections that help recognize potential issues. However, homeowners must keep tabs by actively monitoring their property’s condition to prevent further water damage to nearby units.

    In most cases, the HOA insurance may cover damages caused in common areas, while homeowners require insurance policies for their units. Effective management of water damage situations requires clear communication and understanding of individual responsibilities and HOA policies. While reviewing an association’s bylaws and insurance policies, each homeowner must also look into specific guidelines provided by an HOA, which will help everyone understand their roles in maintaining and repairing water-damaged areas.

    Cost Allocation on Repair Fees

    • Common Areas

    The HOA usually pays for repairs for water damage that originates in common areas, such as shared roofs, exterior walls, or communal plumbing. Usually, the HOAs have reserve funds or insurance to cover these costs. The expenses are distributed among homeowners through special assessments or regular HOA fees. Homeowners can use this septic system maintenance checklist as a guide to prevent expensive repairs.

    The distribution of these expenses should be specified in your HOA's governing documents. Homeowners who want to know their financial obligations should review these documents. HOAs should communicate openly about the repair process and cost distribution equally to homeowners.

    • Individual Unit

    Repair costs for individual unit water damage usually fall on the unit owner in a community managed by a homeowners association. As the landlord, you are responsible for repairing damage from within your units, such as leaks from personal appliances or internal plumbing issues. Most of these costs are usually covered by the homeowner's insurance policy. 

    However, your HOA might share some repair costs if the damage affects common areas or involves common and private spaces. Clear guidelines in the HOA’s governing documents and open communication between the association and homeowners will help ensure fair allocation of repair fees and prevent conflicts. At the end of the day, homeowners should review their insurance coverage and HOA bylaws to understand their financial responsibilities.

    • Shared Responsibility

    Most of the time, homeowners and HOAs may split the costs in cases of water damage that affects both common areas and individual units. The homeowner association (HOA) usually pays for repairs financed by reserve accounts if the damage stems from common areas like roofs or shared plumbing. 

    Homeowners might have to pay for your internal repairs if the damage reaches specific units due to HOA maintenance or repairs. In situations like this, cost-sharing agreements should be worked out between you and your HOA, depending on the cause of the damage. 

    Clear Guidelines for Homeowners to Prevent Water Damages

    • Regular Inspections

    Regular inspections are important for preventing water damage and maintaining property integrity for homeowners. You should schedule routine inspections of your plumbing systems, such as pipes, faucets, and hoses, to spot and handle leaks as soon as possible before they cause significant damage to your property. However, it would be best to inspect roofs and gutters regularly just to ensure they are free from debris and in good condition because clogged can lead to water overflow and damage.

    Look out for indications of moisture or mold in basements, attics, and other moisture-prone areas on your property. Ensure that appliances, such as dishwashers and washing machines, are well-maintained and show no wear or leaks. Reduce the likelihood of significant water damage and expensive repairs by carrying out these routine inspections and identifying potential problems early. Implementing these procedures supports the general safety and health of the home environment in addition to helping to preserve your property’s integrity. 

    • Drainage Management

    Preventing water damage in your home requires proper drainage management. To divert water from the foundation, ensure your gutters and downspouts are debris-free and working perfectly. Keep gutters clean regularly to avoid clogs that can cause overflow and possible damage. However, to prevent water from accumulating around the house's base, you should consider extending the downspouts at least three to four feet away from the foundation.

    Aside from encouraging appropriate runoff and preventing water from pooling close to the foundation, you should consider grading their property's landscape. Sump pumps should be installed and maintained in crawl spaces and basements to control excess water. Always check the maintenance and efficiency of any current drainage systems, such as drainage tiles or French drains. 

    Conclusion

    Protecting and preserving the value of properties within their communities is a major responsibility of HOAs. HOAs must conduct routine inspections, respond quickly to maintenance issues, and inform homeowners at every stage. As the landlord, it is also your duty to report any indications of water damage and take precautions against it within your property. Together, you and your HOA can avoid water damage, preserve property values, and make sure the community is sustainable over the long run. Open communication, routine maintenance, and proactive inspections are vital to achieve this.

    partnered post • client image